How your gel nails last 4 weeks 💅🏻✨ The correct application & curing
Many women dream of perfect gel nails that last for weeks. But going to the nail salon can be expensive and time-consuming. In this article we will show you how you can easily do your own gel nails at home. With the right tips and tricks, the gel manicure experience becomes child's play!
🔍 The right preparation
Before you start applying gel nails, it is important to prepare the nails well. This ensures that the gel nails last long and look good.
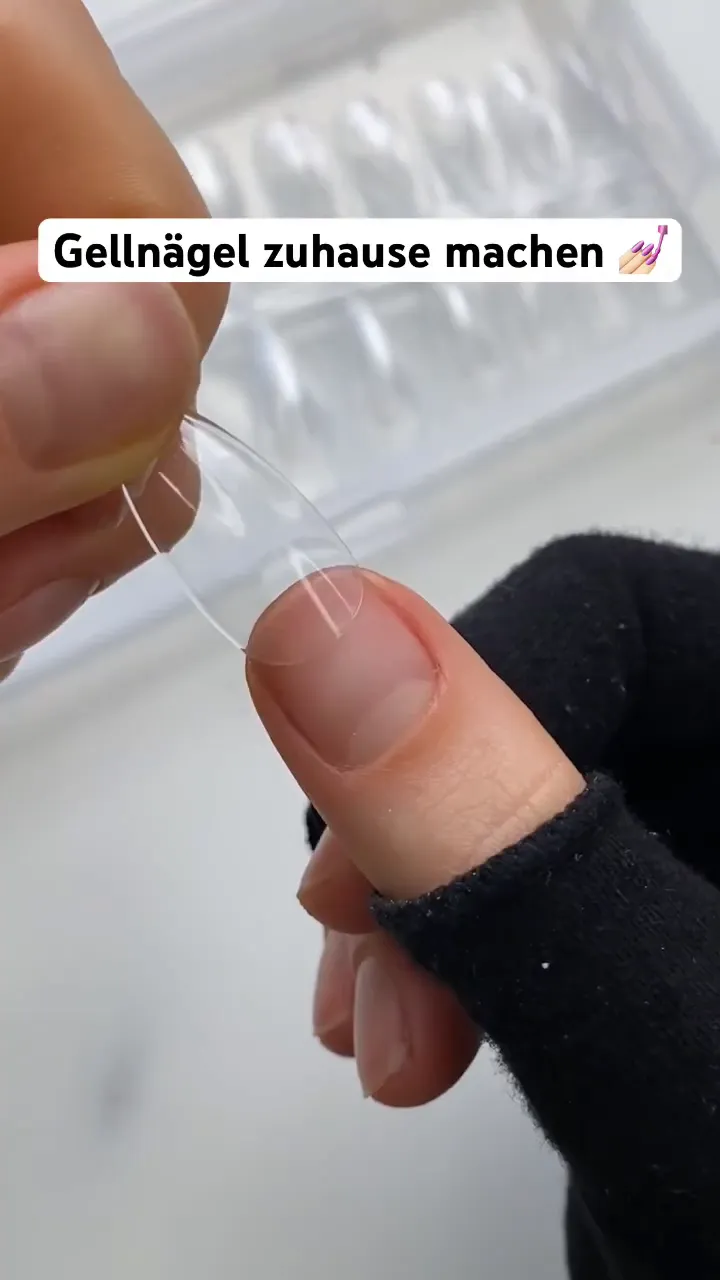
1. Select the correct size of the softkey tips
First, choose the appropriate size of the softkey tips. It is important that these sit well on your natural nails. If the tips don't fit perfectly, you can adjust the top side a little so that they fit better against the cuticles. This prevents an annoying edge from being created when it grows out.
2. Roughen the underside of the nail tips
For a better grip, I slightly roughen the underside of the nail tips. This ensures that the gel adheres better.
🛠️ Preparing nails
Now it’s time to actually prepare the nails. There are a few steps to follow to achieve optimal results.
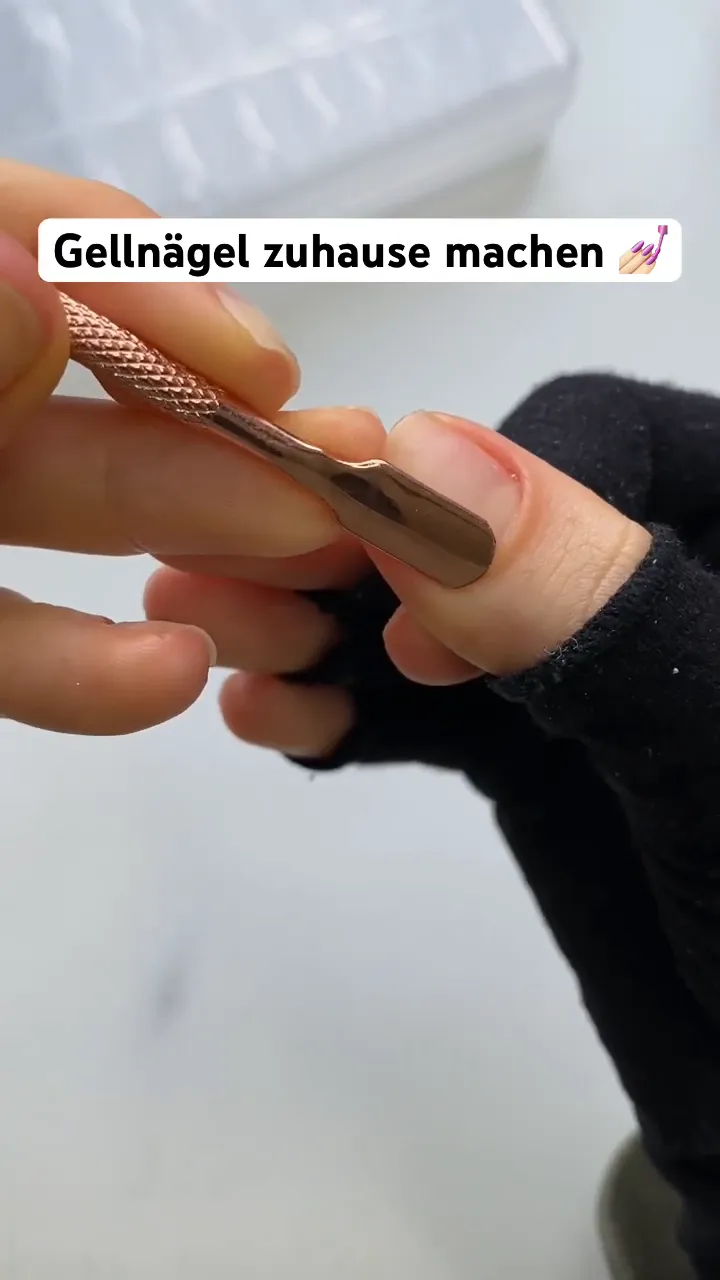
3. Push back cuticles
Use a cuticle pusher to push back the cuticles. Alternatively, you can use a cuticle remover to gently remove the skin.
4. File and degrease nails
After pushing back the cuticles, file the nails into the desired shape. Then use a dehydrator to degrease the nails. This is an important step to ensure optimal adhesion of the gel.

💅 Apply gel
Now the nails are ready for the gel. Here comes the most important part to achieve a beautiful and long-lasting manicure.
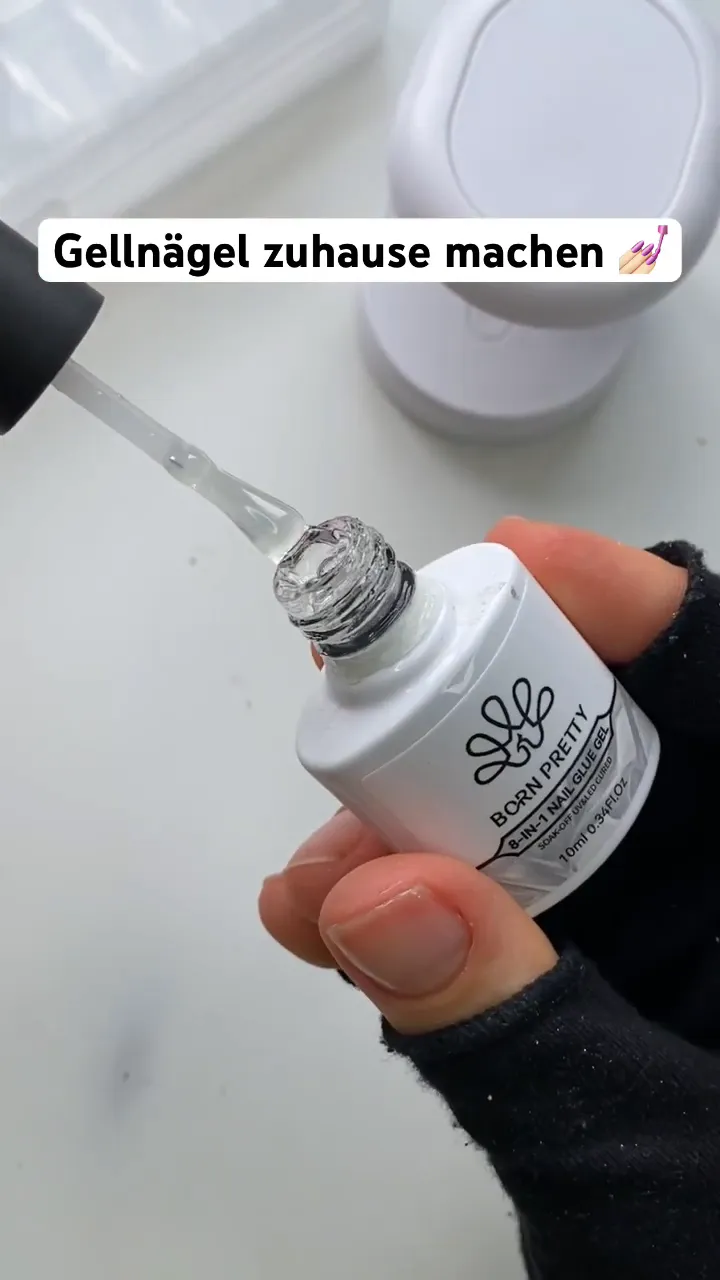
5. Apply primer
After degreasing, apply a primer to further improve the adhesion of the gel.
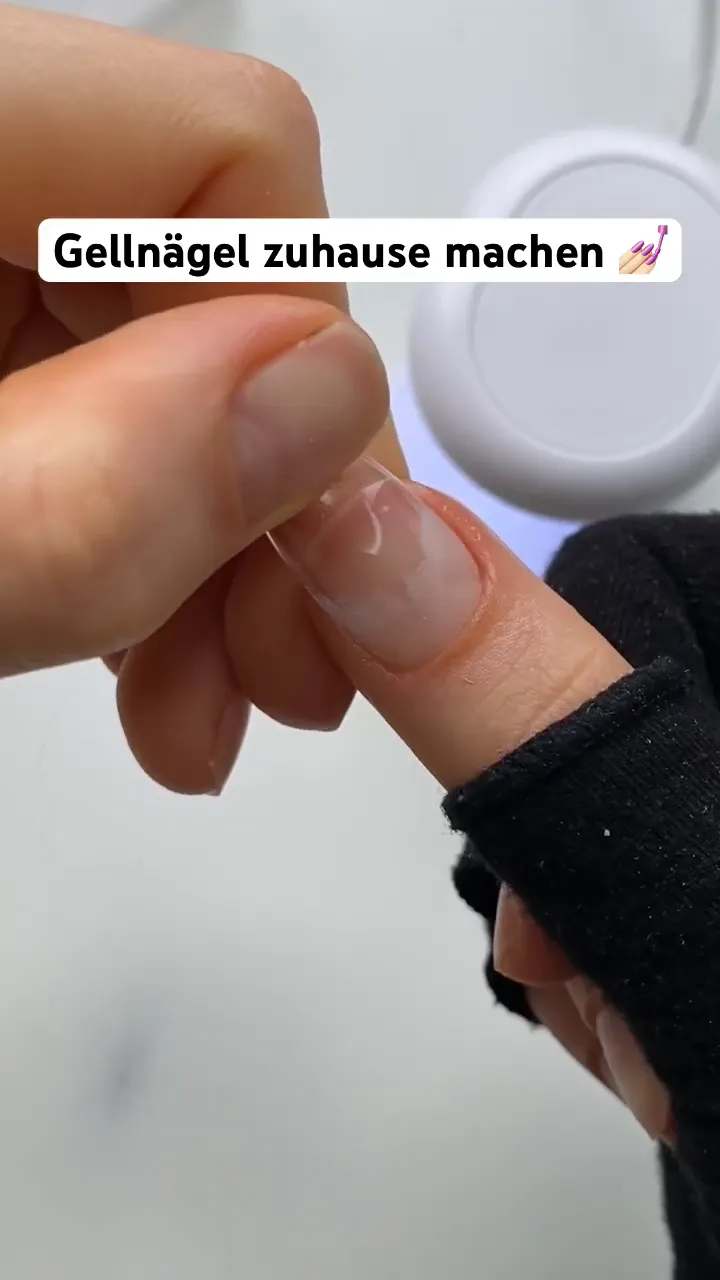
6. Apply a thin layer of glow gel
Now a thin layer of glow gel is applied to the nail. Make sure the layer is even. Allow the gel to harden for 30 seconds.
⏳ Apply nail tips
After the gel has hardened, it's time to attach the nail tips.
7. Apply nail tip
The logo now goes on the bottom of the tip. Place the tip on the nail at a 45 degree angle. Once the tip has reached the front, let it harden for 60 seconds.
✨ Finishing the nails
Now that the nail tips are in place, you're almost done! The final step is painting the nails.
8. Paint your nails
After the nail tips have hardened well, you can start painting your nails. Choose your favorite color and apply it evenly. Don’t forget to cure the gel for the recommended time after each coat.
9. Apply top coat
To complete the look and protect the nails, apply a top coat. This ensures shine and durability.
🎉 Your DIY gel nails result
And there you have it! With these simple steps you can create your own gel nails at home. Make sure you use the right products and follow the steps carefully. This way you can save money and have great nails at the same time!
For more nail tutorials and tips follow our channel! Have fun trying it out!