7 things I wish I had known earlier: Do your own gel nails 💅🏻
Doing gel nails yourself can be a challenging but also very rewarding experience. Many of us wish we had known a few important things before starting nail design. In this blog article we share seven essential tips that will help you design your gel nails even better.
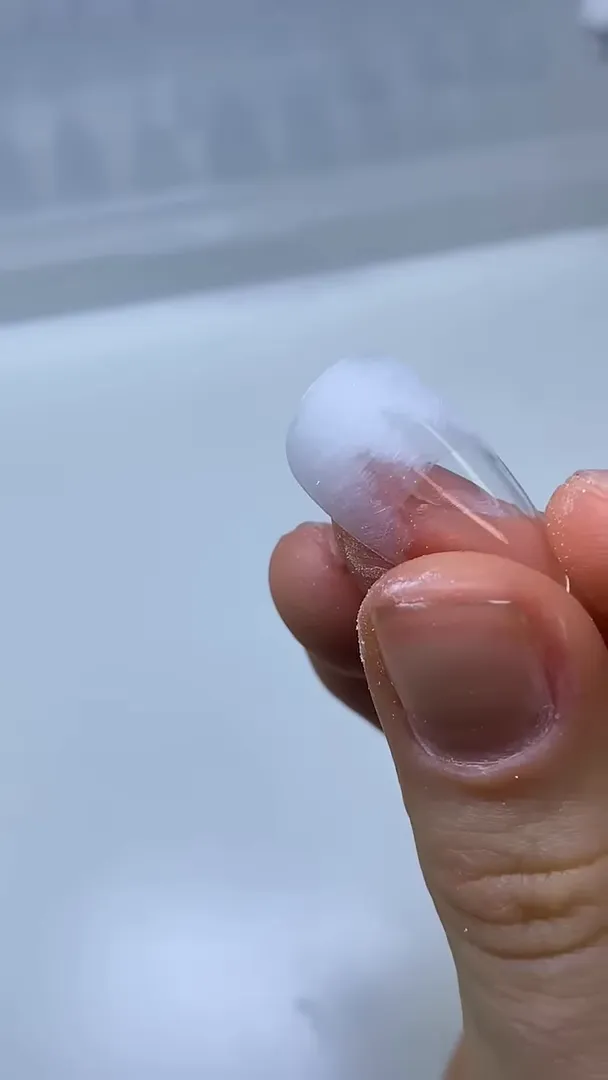
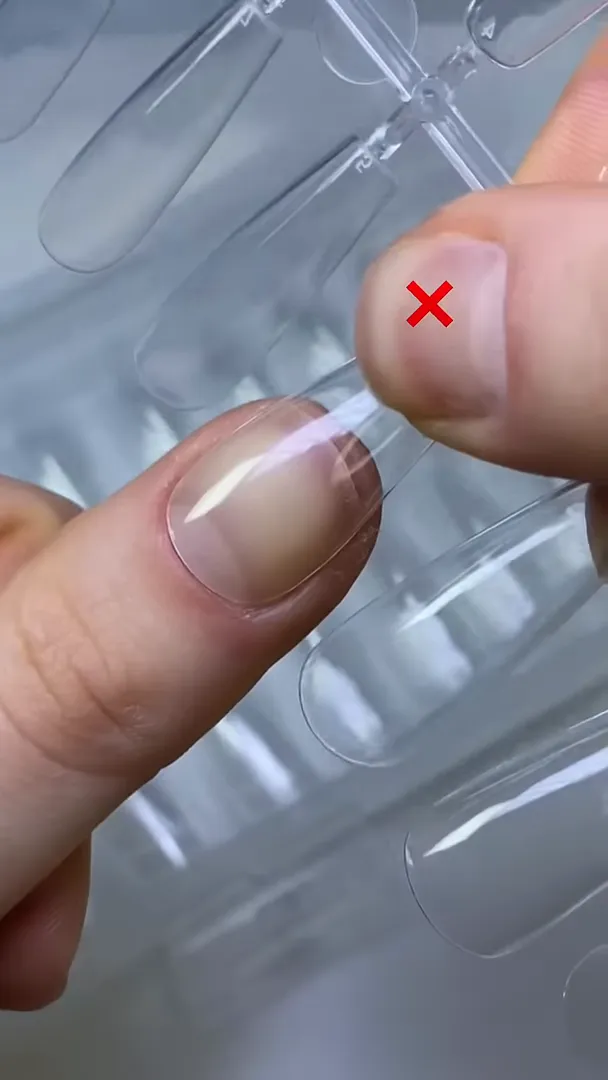
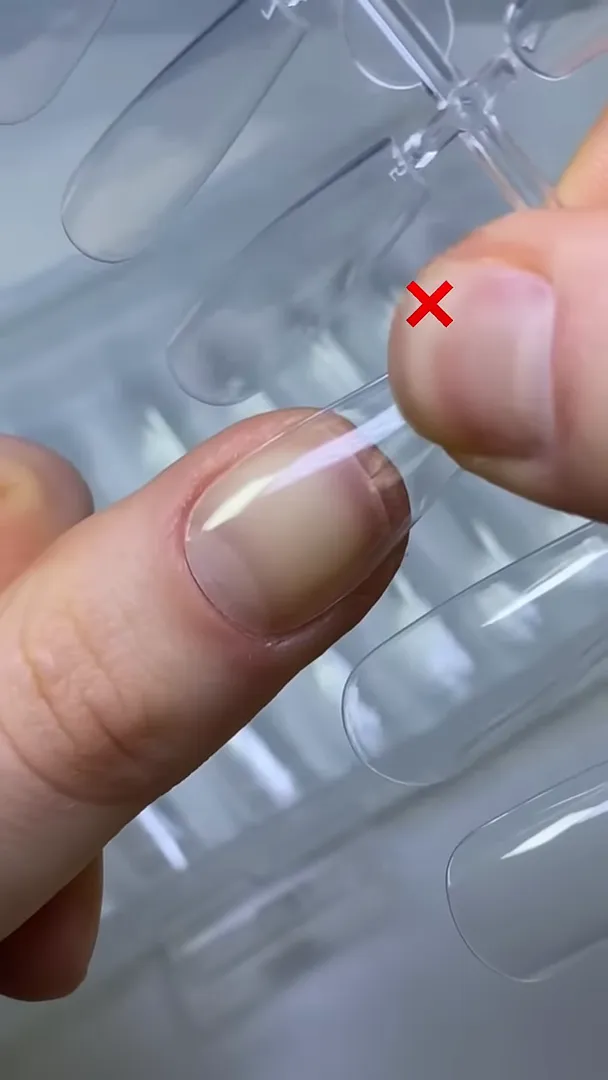
1. Choose the right tip size 📏
The first and perhaps most important tip is choosing the right tip size. If your tip is too large and extends beyond your natural nail, it will be difficult to apply correctly. Conversely, if the tip is too small, you will have to press it firmly onto your nail, which can cause discomfort.

The ideal size should fit perfectly from side to side without having to adjust the tip. If you have a small edge that sticks out, you can file it down slightly to better fit the tip to your nail. This results in a cleaner and more professional look as your nails grow out.
2. Apply tips correctly ✔️
The correct application of the tips is crucial. Instead of simply pressing the tips onto the nail, you should place the tip at a 45-degree angle. Start at the cuticle and let the gel flow forward. This ensures that the tip is applied evenly and there are no air bubbles.
It's important to apply a thin layer of gel first and wipe the edge of the brush before applying the tip. This minimizes the risk of lifting and ensures better adhesion.
3. Apply gel evenly 🎨
Applying the gel is a critical step. Make sure you use enough gel to avoid air bubbles. If you notice bubbles under the tip, you probably didn't use enough gel. In this case, you'll want to apply more gel to make sure the tip sticks well.

A well-applied tip not only looks better but also lasts longer. It's worth practicing this technique for the best results.
4. The correct curing time 🕒
Curing time is also important. Make sure you let the gel harden for at least 60 seconds. This gives the gel enough time to fully harden and form a strong bond to the tip.

If you don't let the gel cure long enough, it can cause problems such as insufficient adhesion or faster chipping of the nails.
5. Care and post-processing 💕
After you have your gel nails done, it is important to take good care of them. This includes regularly filing the edges and applying nail oil to nourish the cuticles. Healthy nails not only look better, but also contribute to the longevity of your gel nails.
Regular care helps keep nails strong and healthy, which means you can enjoy your nail design for longer.
6. Use the right equipment 🛠️
Choosing the right tools is crucial. Invest in high-quality brushes, files, and lamps for the best results. Cheap tools can produce poor results and make your nail process frustrating.
Consider which tools are best for your specific needs and invest in them. It will pay off in the long run.
7. Practice makes perfect 🏆
Last but not least, don't forget that practice is the key to better gel nails. The more you practice, the better you will become. Don't be discouraged if your first attempts aren't perfect. Over time, you will develop the techniques and skills you need to create beautiful gel nails.
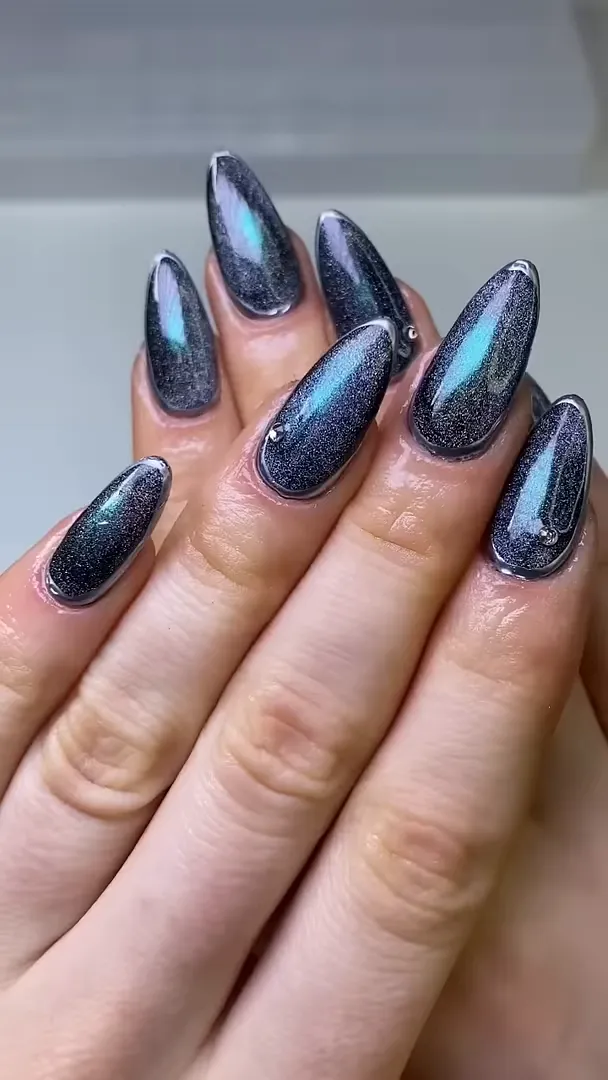
Every mistake is an opportunity to learn and grow. So go ahead and start designing your own gel nails!
I hope these tips help you make your gel nails more successful. If you would like to learn more about nail art, please stop by again!